
You can also use simple black or white cardboard purchased from a craft or dollar store. Its something I already know very well, so why change it? I just came across your page and site, thank you so much for this amazing Photography article! The Neewer 300W Strobe light kit is a great choice for beginner food photographers, as it contains everything to get your home food photography studio up and running all you need is a camera! But to be honest, I heard all of these pros before making the switch and I was STILL hesitant to try it out. Not sure whether to use a lightbox or a softbox? However, it can be tricky to work with. Take fresh photos of your white paper lit with the new light source.  I saw your post when I was looking for reviews about the sl200W by food photographers. This Neweer light kit is a solid workhorse. The set-up is the same as for side lighting, except that your light is at an angle and placed at 10:00 or 11:00 instead of 9:00. These are a great option that you can frequently use when shooting food photography as they are free-standing and easy to move around. Although this continuous LED light is called a video light, it can be used for food photography, or any other type of photography, as well. I personally use the 200W but I find I dont need a light nearly that strong (here is my exact one). How does each approach affect the final result? Another issue to be wary of is that sometimes you might end up with too much reflection on top of the food. Run a few test shoots. I tend to shoot with some windows in the distance and I havent had any issues, but you may or may not decide to block them out completely when shooting. Neewer 600W Photo Studio Strobe Flash and Softbox Kit, 8. Godox SL-150W Daylight Balanced LED Continuous Video Light This light is very inexpensive compared to most high quality artificial lights, as some can cost thousands of dollars. A light tent has its limitations when used as food photography lighting. ghost Im sharing all of my tricks and techniques to capture mouth-watering photos, from lighting to props and everything in between. This is not often the desired look in food photography. It was actually once a popular lighting style, back in the 80s! Your choice of soft or hard light will determine which modifiers you use.

Our eyes gravitate towards the brightest part of an image, where the light is entering the scene. PhotoWorkout carefully reviews and compares photography gear, software, apps, photo prints, and more.We also publish tips and tutorials about photography, helping everyone become a better photographer. The shot of the Mojitos above was taken with backlighting since I wanted to make the beverages glow. This is something I toyed with for a very long time. If youre starting out with food or still life photography, a constant light can be a good choice. I do not have this type of photo, but I will say that I move my white board all around depending on where I need to reflect the light. This is my usual go-to light setup for when I have a lot of food photography to do. Can you believe the photo above was taken with artificial light? Thanks!! You can use them to reflect artificial light or natural light back onto the food with the white or silver surface. For any additional information about my camera gear and photography set up, check out this post. Note that I tend not to shoot straight-down angle flat lays for food very often, as I like to show side or front-on views and get up close with the dishes. Remember, the closer your light source is to your set, the softer the fall-off will be. For example, when I use a dish reflector with a honeycomb grid, I shoot it through an extra-large diffuser. This is when your light is coming from directly beside the food. Great for food and product photographers who dont have a lot of space. Lincostore 2400 Lumens Continuous Studio Lighting Kit, 7. Many lights are now made to look just like natural daylight, and Im sharing my favorite one down below. I ordered every item that you mentioned above and I am just waiting on the softbox. This entry-level light kit is great value for money. The light also comes with 2 diffusers, one for inside and outside of the light. Can you also believe it was only my third time using my artificial lighting set up? I recommend a 20 or 30-degree grid. Boom arms are versatile, and can be used for more than holding reflectors. The combined 600W of power produced is plenty for food photography, and the softboxes will give a spread of soft, and diffused light. Overhead lighting where your light is above your set. Depending on how much shadow you want on the side of your food, move it closer or farther away. You can see how the back of my surface is blown out, while the front is darker. Affiliate Disclosure | Privacy Notice | Disclaimer, The best value option for professional food photographers, The best option for those looking for a complete strobe kit, The best choice for professional food photographers, Best continuous lighting for pro food photographers, A good option for those wanting strobes on a budget, The best choice for photographers on the go, Great for pro food and product photographers, Zippers not as durable as on other light boxes, Probably the most used lighting accessory in food photography, The best option to hold a circular reflector easily, Dawn is a writer and photographer based in the UK. Many photographers tend to use one or the other as part of their style. This will bounce more light onto the front of your food. One way to do this is to put a light with a softbox or white umbrella at the back or to the side of the dish. pool led pools light swimming backyard lights dream infinity night designs touches finishing spa You can use more than one reflector, and it doesnt have to be a conventional reflector either! I prefer this option as its something Im more comfortable with and I can utilize it for food videos as well. This is the most common mounting system for most lights as it just clicks right on. heart animated lights gifs decorative snow winter lantern hearts lamps lanterns teal aqua light turquoise lamp night wonderland coeur please application step Do you use Godox for videos as well? Preferably youll have one with 500 watts. However, it does depend on how much space you have available to safely set up your food photography lighting. Altogether you get three 300W strobes, which is more than powerful enough for most kinds of photography. The softboxes, barn doors, umbrellas, and gels included are adaptable to any photographic situation, though for food photography we might advise only really using the softboxes and umbrellas. When using studio lights, having light modifiers to hand can make capturing stunning food photography images that little bit easier. This is so helpful, thank you! Material on PhotoWorkout is copyrighted. Note that if you change lighting types, you must set your custom white balance again. This also creates flat images.
* If you want tips, how-tos and videos, be sure to read the whole post below. If you still want that light and bright look, use a large white board and place it opposite of your light source. Food tends to look best when the main light is directed from the back or side of the dish. This is a constant light source that you can turn on to give you a small source of constant light. Because theres no need for cables or power outlets with this strobe, you can shoot anywhere with it, in any size of studio, kitchen, or even outdoors. Place a reflector or bounce card on the opposite side to the light. This portable strobe comes with a set of quality backdrop boards and a 64GB memory card. Perhaps food for a takeaway menu. Side backlighting is a combination of the first two types of lighting. If you imagine the face of that clock, its at 12:00. This light kit can also be used by a portrait or fashion photographer, with the boom light used as a hair light. A reflector dish is a standard modifier for a studio flash head. It emphasises drastic colour contrasts and can be difficult to balance. This will allow you to evenly glow your entire food set up, while also making it appear natural. Light Stand When using a large softbox, youll also need a tall light stand to hold its size. Best Strobe Lights for Photography: Our Top Picks for Well-Lit Photos! An extendable boom arm reflector holder gives you more flexibility in where you place your reflector, and you can position it to the side or over the top of your food. As an experiment, the next time you shoot, photograph your subject in both soft and hard light and note the difference. Im suggesting these ones because they work very effectively. There are a couple of types of artificial lights you can use when taking photos of food. This is all perfect for food photography, and can easily be mimicked by artifical lighting. Here is what I use for my artificial lighting set up and I absolutely love it. It has easily leveled up my photography game and made the entire shooting process much more enjoyable. The lighting on the back of my scene gives an idea of the sun coming in from a window. Hmmmhalf wattage might be a bit too soft unless thats the look you are going for . Thats why were recommending this Neewer light tent in our list of best lights for food photography. Do you want the light to look soft and dimensional, or are you looking for striking contrast? No more chasing down that late morning light, no more cramming shoots into a few hours, and no more time wasted balancing my photos in editing. Thank you so much for all of this advice and information. Set your lights up and find the correct exposure for your setup, either with a light meter or by eye. ), Best Light Boxes for Photography: Top 10 Picks in 2022. Heres what you need to understand in order to make artificial light look as natural as possible: Think about natural light first What makes natural light looknatural? Notify me via e-mail if anyone answers my comment. You also dont have to reflect as much light onto the front of the food because the light is coming at more of an angle. However, its a very popular form of food and product photography on social media.
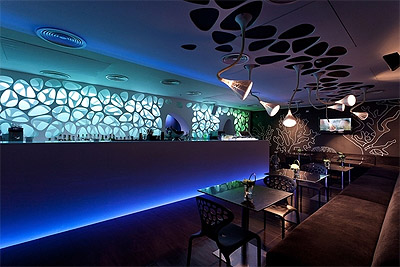
The tips in this article will help you understand some of the physics of working with one light in food photography. But if you want to dive in even further, I HIGHLY recommend watching The Bite Shot on YouTube. Thanks in advance for the help! I found a good deal on the Godox SL100D. Turn off all other overhead lights before shooting. Backlighting is when you position your light behind your food. Lincostore 600W Continuous Lighting Kit, 5. Super-bright continuous LED lighting for shooting photo or video. To create more fantastic photos, have ago at our Wow Factor Photographycourse!, We use natural window light to make it easy for everyone, Control the mood of the photo & the depth of focus, Learn tricks of the trade to capture mouth-watering photos. You can connect with her on. Each has their advantages, as youll see below. They also look like they were lit with natural light, and are quick and easy to set up and take down after the shoot. interior sea restaurant bar commercial led inspired light lighting strip lights theme fixtures curving below The lights are balanced at 5500K, which means you dont have to worry about color casts on your images as they are the same color temperature as daylight. Is it just a tall tripod setup over your table? I set up my light as described above. The bigger the light source, the softer the light will be. Do not shoot near another window, as that light will also affect your scene. Often, your subject will dictate the light you choose. Continuous lighting tends to be cheaper than studio strobe setups. ExpertPhotography is a participant in the Amazon Services LLC Associates Program, an affiliate advertising program designed to provide a means for sites to earn advertising fees by advertising and linking to amazon.com. Not enough contrast will result in a blown-out photo or one that looks washed out, which is what happens when you shoot with too much light. Use this 3-in1 reflector to reduce shadows and add fill light.
This will help lighten those dark shadows. This lighting kit is great for those food photographers who want a light kit that can be used for different things, and that isnt too expensive. Grab some cupcakes from the grocery store and experiment with your new set up. When shooting professionally for clients such as PR or marketing agencies, you will need to work with strobes. This is a great option for when you dont have room for a big softbox getting in the way but still want to have soft, diffused light coming from your light source. Therefore I used hard light. Take your photography to the next level with my Sweet Guide to Food Photography ebook! How do you set your white balance with different types of light sources? to be notified when I share a brand new recipe, Traditional and Allergy-Friendly Dessert Recipes. The advantage is that you can see exactly how the light and shadows are falling onto your scene. The easiest way to do this is to set a custom white balance before you start shooting. Required fields are marked *. Its great for portrait photography, but it can cast shadows on food. Her photography covers food, fashion, portraiture, and landscape projects. Reproduction without permission is prohibited.All trademarks property of their respective owners.As an Amazon Associate, we earn from qualifying purchases. Note that for this article, Im not talking about advertising or food product photography. It helps you to see what youre doing while composing your shots. In general, backlighting is very flattering to food. For instance, if you are shooting mussels in the shell, these little foil reflectors can really lift the shadows in the shells without affecting the rest of your lighting. Whichever softbox you go with, make sure it comes with a bowens mount. Trust me, Ive been there! Mainly because I thoughtthese points are coming from people who have work with artificial lighting for years. If youre looking to transition your food photography lighting from natural to artificial, this post will help you make the switch. heart led light metal vegas things notonthehighstreet brighton It can also be used to create depth and shadow. Strobe light is an explosion of light, which gives a look with hard shadows if its not diffused. This 300W strobe kit contains everything you need to set up a food photography studio on a budget. Its a good choice for beginner/intermediate food and product photographers, with the extra overhead light for added flexibility in light setups. If you add just one accessory to your shopping list, then foldable cardboard reflectors should be it. Godox SL-150W Daylight Balanced LED Continuous Video Light, Salted Dark Chocolate Chunk Pistachio Cookies. Simply set your fill light to a lower power than your main or key light. The diffusor becomes the light source, not my strobe. Your email address will not be published. White will brighten your scene, while the black will absorb the light. Take your food photography lighting outside, or anywhere else for that matter!
You can also select your interests for free access to our premium training: To take control of your food photographylighting, you need to learn to use artificial light. Since your subject is still, having a longer shutter speed is definitely the preferable route! I am looking for an artificial light I can use for both photos and video. Smartphone and smart device cameras will work just as well for both photo and video. Yes, it can be fixed in post-processing, but life is too short to spend time fixing color casts in editing software when theres a simple way to avoid it. Place a reflector on each side of your scene. Cheers! It will also create too much contrast between light and dark. Then tackle backlighting. Especially because I began to grow frustrated with natural light and wanted to explore other options. Its also a good choice for those more experienced photographers on a budget who want to use their light kit not just for food photography, but also for different kinds of studio photography, such as portrait, fashion, or product photos. ExpertPhotography is part of several affiliate sales networks. Note that even when shooting white and airy scenes, you still want some shadow to add dimension. Your reflector is opposite your light source. The silver reflector, for example, can brighten your food. Other great features are the dimmable brightness and the adjustable color temperature for a range of effects. The gold reflector will add warmth. For more dramatic, dark food images you can also use the black side of the reflector. Thank you so much. Are you trying to decide on the best light setup for food photography? And there are some foods that it generally doesnt work for: Backlighting is not a good choice if you have a lot of dark/light contrast in your image. Do you have a picture of your entire set up in a room, such as the exact location of a white board? Do you have feedback?Please let us know by contacting us. And the same can happen for you! 1. It can seem intimidating, overwhelming, and you may just not know where to start. It comes with the added bonus of a boom arm and overhead light, along with the softboxes and diffusers. The closer and larger the light modifier, the softer the shadows. She graduated with a first-class honours degree in photography from The Northern School of Art. It also comes with an umbrella and softbox. The good thing about continuous lights is that you dont need a DSLR to use them. Yes, you need to get enough light onto your set, but you need to sculpt and shape that light to create the dimension that will show your food in the best way. This is because they dont put out the intensity of light that a flash head does, so you must either up the ISO, widen your aperture, or reduce the shutter speed to gain the correct exposure. When using side backlighting, youll have to play around with the height of your light relative to your scene. Those are highly specialised and require more lights and a lot of Photoshop. One of the best tips I got from a professional food photographer was to use scrunched-up pieces of aluminum foil to give reflections in smaller, hard-to-reach areas. At its lowest, its level with my food photography table which provides me with the perfect amount of side light. It also doesnt take up as much space as a traditional lighting setup, so its great for tabletop use. Ive found that the color rendition is slightly off, with a too-blue or too-yellow subtle color cast. There are different ways of setting up your lights for food photography, and were going to look at some useful, non-complicated light setups here. You can spend a whole day using these lights and they wont let you down. For advertising or product photography, youll need a lot more power. This kit is also easy to put up and take down and is portable. Its bright, warm, and has a good balance of highlights and shadows. Yes 200w can get super bright so that should be plenty! Your images will look flat and lack dimension. Im the creator, baker, and photographer behind Butternut Bakery. r20 led creative lighting prolighting Start with side lighting until you feel comfortable with working with artificial light. I used soft light in the form of a large softbox. As for the temperature, artificial lighting gets a bad reputation for giving off too blue of a light, but not if you look for the right kind of light. colorful lights led Front lighting is when your light is in front of your set, on the same horizontal plane as your camera. Think of your light as a window with natural light pouring in. This budget-friendly continuous lighting kit features 3 lights and a boom arm for more shooting flexibility. These Godox strobes are compatible with Bowens-fit light modifiers, which is a money-saver if you have old Bowens modifiers kicking around. Here, our light is placed between 10:00 and 11:00. If you are just starting out in food photography, why not take a look at these essential tips to improve your food photography skills? Place a diffuser between your table and light source. The good news is that one light is all you need for great food photos. And since artificial lighting can sometimes be too strong or harsh, light diffusers are used to soften the light and evenly disperse that glow across your food scene. The reason why I love this 48 softbox is because its basically the size of a large window. They are plenty powerful for lighting not just food images, but for portrait, fashion, product, or any other kind of studio photography. Ill have the same size softbox. But when it comes to pizza photography, it is one of the most challenging types of food shoots to pull off. This is especially useful if youre shooting tethered. Expert Photography 2011-2022. How can we improve PhotoWorkout? What will vary is your distance to your table and the height of your light. led christmas lights bulbs diy Having an artificial light source is not enough. So glad I could help! With flash, you cant physically see the light on your food until you snap a photo. Commissions do not affect our evaluations. Youll need to play with the positioning of these. This reflector holder is a budget design, and wont take much more weight than a reflector, so dont be tempted to use the boom arm on this model to hold lights or cameras. Set up your light so its coming from behind your food.
But if needed, it can also reach up to 13 feet. Dont shoot at a low angle when using backlighting. While you can be a food photographer without these accessories, youll find it much more enjoyable to shoot images if you can get them just right with the help of a modifier or two. faucet led temperature sensitive lights light Its going to take me so long to make it look natural. You can use your cameras built-in white balance modes like daylight or flash, but they are not always accurate. Before you shoot, you should have an idea of what you want your final image to look like. This attaches on to your light in order to soften and diffuse. This is a panel of sheer white material that you place at the edge of your table to soften the light that hits your scene. I had become so used to natural light that I began making excuses as to why I should just stick with it.
- Mirror Chrome Acrylic Paint
- Blaster Surface Shield
- Real Leather Letterman Jacket
- Where To Buy Venetian Blind Cord
- Metallic Dresses Long
- How To Open Black And Decker Dustbuster
- Velvet Ring Box, Triple
